My quest for awesome meat started many years ago. I was a young man, raising a family. I had a belief that, as a "man," I should be able to throw down a rack of baby back ribs that I could be proud of. I should be proficient, and able to repeat at will. That I should be able to prepare these ribs for guests, that would enjoy and appreciate my efforts.
I read. I practiced. I made my own rubs. I became proficient. Then, the desire for a wood burning smoker struck me. I started searching and reading on the internet. I visited local businesses. I became this close (-) to buying a Big Green Egg.
But then it struck me. "Why not build your own smoker?" I settled on an Ugly Drum Smoker (UDS)
I read nearly every post on the Mother of All UDS Threads on the BBQ Brethren web site. This took many, many days.
I decided what attributes where important to me, and what aspects I could forgo. Then, I started gathering supplies:
55-gallon open-top drum
Weber Kettle coal grate
Weber Kettle food grate
Black pipe bottom vents and caps (x2)
Ball valve (with black pipe attachment)
Black pipe chimney (for lid)
Fire box:
Pizza pan (for ash)
expanded metal grate
Wire handle
Stainless steel hardware (no zinc coating!):
To build the fire box
To support the food grate
Lid hook
Handle
I also purchased a variable size drill bit to get 1-inch holes drilled near the bottom for vents.

During my studying and research, I located this diagram (probably on the BBQ Brethren website) but, shamefully, I don't recall where I stole it from (I would like to give credit, but I can't). While I didn't follow this diagram explicitly, I did use it as a guide for measurements.

Starting
I located a local supplier of reconditioned drums that were sold with the understanding that they were being used for homemade BBQs. They were clean on the inside, free of any coating or contaminants. This was important to me. I did not want to deal with removing a painted-on finish from the inside of the drum. The open-top drum with lid cost about $50. (Remove the rubber seal from the lid and any adhesive).
I ordered the variable size drill bit from ebay. I'm sure they range in quality. Their cost can vary wildly too. I bought a cheap one. I only needed it to produce 3 holes.
The local "big-box" hardware store carried all of the Weber replacement parts (coal grate, food grate), as well as the black pipe, and stainless hardware. They also had the expanded metal for the fire box, the lid hook, and a handle for the lid.
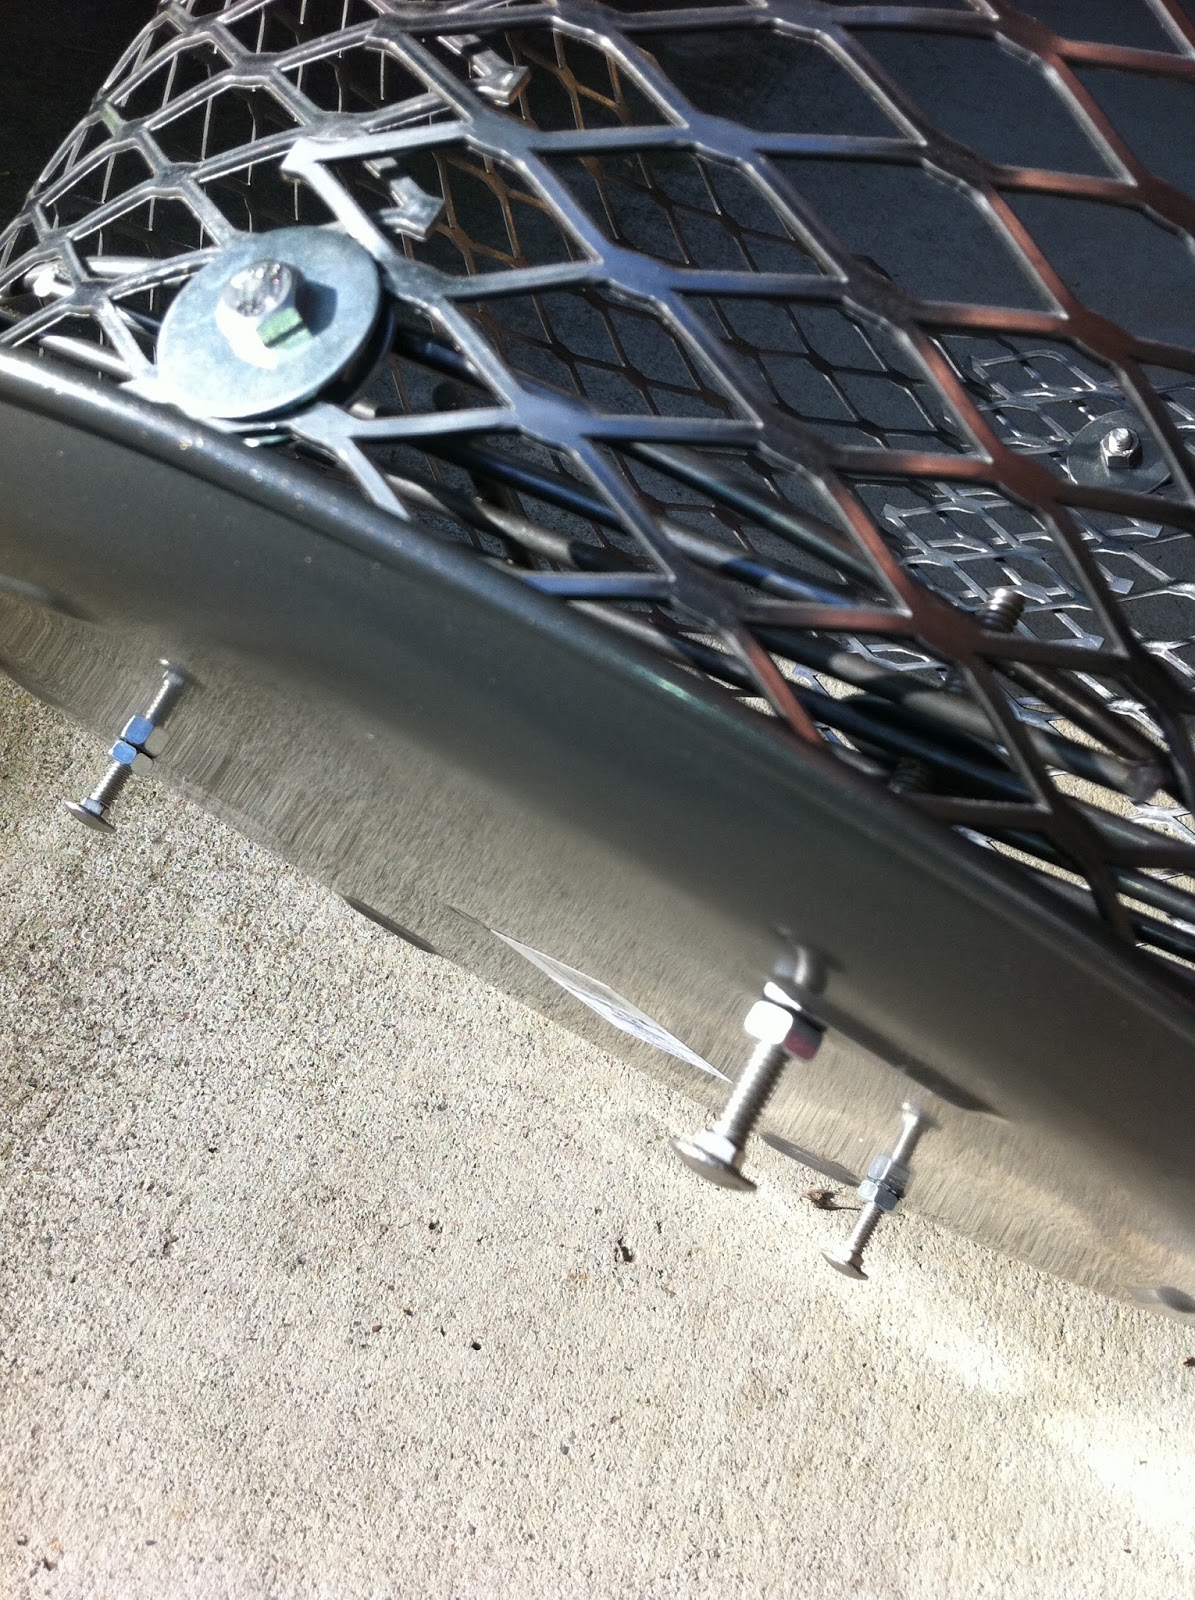
Here are a few pics of the fire box construction:


I formed / wrapped the expanded metal around a propane tank to get the size I wanted. As I lack the equipment or skills to weld, I used the stainless steel hardware to join the expanded metal and the Weber Kettle coal grate together. It actually came together very well.


Pizza pan as an ash catcher!

Pizza pan installed to the fire box, with stainless steel carriage bolts and nuts to give the fire box elevation off the floor of the drum (needed for proper air flow).

I used the variable size drill bit to drill the holes near the bottom of the drum. Using the black pipe pieces as a gauge for size. Stopping the drilling when I could get the threaded black pipe to thread into the drum.
(I'm going to apologize in advance for the following pics showing my crusty, now old, drum)
Black pipe vent with cap installed

Vent pic with ball valve installed

6" x 2" black pipe chimney in action

Hook for hanging the lid on the side of the drum when you're messing with things on the inside

Lid handle

Once the UDS was assembled, I built a huge fire in it to raise the temperature high above any normal cooking range and just let it burn in order to clean it of any contaminants, residues, etc. I scrubbed it and rinsed it, then coated the interior with a vegetable shortening like Crisco to "season" it. I then ran it a couple of times at normal operating temperatures without food, just to get it "set" and learn how it runs.
Since it's build, I've cooked pork (butt and ribs), chicken, beef (chuck, tri-tip), turkey (whole, but spatchcocked), potatoes -- all great meals.
Most recently, I added a modification I had been contemplating. After all of the initial reading, I wasn't keen on the temperature probe being mounted on the side of the drum. I didn't get the sense that this would give an accurate representation of the temperature near the cooking grate. I've been using digital thermometers (two) mounted in wood chunks and running the probe wire through the 1-inch bung opening in the lid. This was a bit of a hassle each time I removed the lid during a cook.
Here's the probe mounted in a piece of hickory that I would set on the cooking grate

Upgrades
Three new little modifications that I recently completed that have made cooking so much nicer:
1. Adding a port for the temperature probe wire
2. Adding a shelf to hold the digital temperature gauges
3. Adding the BBQ Guru probe tree
Here's the port I added. I found this little fitting floating around the garage and it struck me as perfect for the job

I whittled a wine cork to fill the void spaces and eliminate air leaks

Here's how it looks all set up:

The unit on the right is wireless, and sends a signal to a temperature gauge that I can keep in the house to monitor what's going on without grabbing the binoculars or going out to check.
Here's an "aerial view" of the probe management set up

BBQ Guru Probe Tree can easily be place anywhere on the grate


I like using two probes. Surprisingly, I can get temperatures that vary up to 20 degrees between the two. Ultimately, they settle down and read within 5 degrees of one-another. But I use the two, and consider the actual temp somewhere in between.
Results
Here are a few pics of what the UDS has produced over the years
Tri-Tip

Shredded Beef from Chuck steak

Ribs!! One with dry-rub only, one with sauce

Spatchcocked Turkey

Argentinian Chicken and Beef (served with chimichurri sauce). Twice baked potatoes.

Stuffed Pork Loin

More cooking adventures await.
No comments:
Post a Comment