Sunday, October 6, 2013

Tour De Fuzz (2013)

Another great Tour De Fuzz!
This year, I got my buddy Johnny to join me. He and I rode this together in 2011 for the first time. I did it solo in 2012. And this year, Johnny was back for 2013.

Last year they added an optional timed hill climb feature for the climb up the Geysers. It's optional to participate. If you look at the ride on Strava, the section is labeled "Skipstone". It's a 4-mile climb at 8.5% grade. It begins about 19 miles into the century. A good way to get yourself cooked and leave another 75 miles to finish the ride! Link to results.

Some views from the climb up Geysers


Here's a link to the route


Beyond the great route, I have to sadly admit, my favorite part part of this century is the food! The past two years, they've thrown down with some awesome barbequed pork for the after-ride meal! Pig! What else would the 'Fuzz' serve, right?! And they don't skimp. They're not anal about collecting tickets and rationing out your serving. If you want more, go get it. Along with the pulled pork, they had healthy vegetables, coleslaw, potato salad. You could also have bbq'd chicken (I stuck with the pork though). Same for the beer. It flows like water. No ticket exchange, or counting. You want a beer? Go get it. No big lines. Just what you would want if you just finished 100 miles and were thirsty for a beer.

So, do me a favor, and don't tell anyone about this awesome century 'cuz I don't want it to get all screwed up with too many people signing up and making it difficult for me to get in ;-)

Saturday, June 1, 2013

Product Review: Lizard Skins Bar Tape

After about 15 months of use, the stock Fizik bar tape on my Cervelo R3 needed to be replaced. The Fizik was nice tape, and I was a bit reluctant to replace it with something different. But I stumbled upon the Lizard Skins tape at the Sea Otter Classic this year and decided to give it a try.

From Crankbased

The product comes in 3 different thicknesses -- 1.8mm, 2.5mm (my choice), and 3.2mm. I prefer to wear gloves with minimal padding, and I tend to use my road bike for long journeys on the weekend. For the bar tape, I opted for the middle of the road thickness (2.5mm) that would provide some measure of comfort without being overly cushy or thick.

What makes the Lizard Skins tape different from the others is the grippy, almost sticky rubberized feel combined with a slightly cushy feel (at least for the thickness I chose).

After some googling, I found a tutorial on wrapping bars using the figure 8 method that eliminates the need for the "cheater" patch of bar tape for the brake clamp area. Here's one youtube video that shows the process. I think I followed a different video. I like this music though :-)


During the install, I was able to pull the tape taut (careful not to stretch) and ended up with the perfect length of tape to wrap using the figure 8 method.

After a few hundred miles of riding, I think I can say that I really like this tape. It seems to be holding up nice and staying in place. I really like the tactile feel of the tape. The tackiness is confidence inspiring -- providing a measure of security for those moments the bar might be bounced from your grip. The light padding soaks up road vibration. The red color is slightly too light to be a perfect match for my Cervelo, but I like the change from the black tape that was on the bike previously.

I'm giving the Lizard Skins bar tape two thumbs up.


EDIT: October, 2014

Thought I'd post a followup with a few pics after roughly 15 months of use and approximately 5,900 miles. Interesting that if I read this post from the beginning, I see that I replaced the stock Fizik tape at the same time interval (15 months).

As you can see, the top layer has worn off the "high traffic" areas of the bar. You might also note that the stock finishing tape (the little strip that terminates the tape near the stem) is still intact. I thought that this was pretty special, as I've re-wrapped the tape a few times as the tape had shifted out of place from time-to-time. I was able to remove, and re-apply the terminating strip several times and it retained it's "stickyness". I thought this was pretty impressive.

I have -- and continue to -- recommend this tape, although I must admit, I'm planning to try a different product next time around.

Friday, May 10, 2013

Wine Country Century (WCC) 200k

Great day on the bike!

This was another last minute decision. I originally had plans to ride with a buddy, but something came up and he was suddenly unavailable. I looked around on-line and found this century. The tough part was that it was sold out. This is a very popular ride. Registration opens in February and usually closes right after. Fortunately, they have a pretty simple transfer process and I was able to find someone on Craigslist who was suddenly unable to ride. A couple of text messages and paypal clicks, and the entry was mine.

There are lots of popular century routes that begin around Santa Rosa CA. This is one of many. Some of the same roads are used in Levi's Gran Fondo, the Tour de Fuzz, and probably dozens of others. Some of the intersections have so many route marking directions it's difficult to know what direction you are supposed to go.

The weather was unbelievably nice on this day. The coast was clear and beautiful. Things heated up as we moved back inland. Many riders were sagging out after the lunch stop. Sadly, one pour guy lost his life on this day. His heart gave out about 10 miles before the lunch stop. This hit me pretty hard as I witnessed the responders administering CPR on the roadside without success. News of riders death.

Here are a few pics from the day.

Early in the climb up Coleman Valley, looking east.
From Crankbased


Near the top of Coleman Valley Rd.
From Crankbased

Coleman Valley Rd., just as you drop down to the coast.
From Crankbased

From Crankbased

Hwy 1 as you head north toward Jenner.
From Crankbased
From Crankbased


Beginning the trek back inland along the Russian River / Hwy 116
From Crankbased

The many Russian River crossings
From Crankbased

From Crankbased

From Crankbased

Here are all the beautiful details from my GPS. Click on "view full route"


Sunday, April 28, 2013

Wine Box to Cruiser Bike Basket

From Crankbased


Sadly, I continue to justify being a hoarder.

I recently became obsessed with adding a box to the back of my cruiser. I love the old cruiser and I use it a lot for getting around town on lazy days. With the beginning of summer lurking and thoughts of getting out to the local farmers market, I thought the addition of a wooden basket would be useful, kinda cool, and fun to build. I had a metal rack for the rear in my stash of bike junk. I dug that out and bolted it on with spare hardware from my scrap hardware bins. Now I needed to find the right box.

From Crankbased

I looked on-line for an appropriate box but didn't see anything that I wanted that was also at a price I was willing to pay. I checked the two big local hardware stores for a pre-made box and struck out there as well. I had planned to start checking the antique stores for a nice, worn box with character. If I struck out there, I thought I could build one pretty easy using some scrap cedar planks I had stashed in the garage..... than I remembered... Up on the shelf in the garage was a nice little wine box that was not being used to it's fullest potential. I dug it out, threw the junk sitting in it back on the shelf, and began sizing it up.

I tried setting it on the rack length-wise first, and then crossways. I liked the width (13") but didn't like the length (too long). I needed to shorten it, without loosing too much of it's character and still maintain a useful size -- Not too big, not too small. 13 inches square seemed like a good size. Big enough for two six-packs and a little extra. I drew a line on all three sides 13" from the end, and took the circular saw to it.

From Crankbased

From the scraps, I knocked out the end piece and gathered up the nails to reuse them. I hammered the end piece in place and sized up the box sitting on the metal rear rack. I kinda like it. I just needed to find the right way to mount the wooden box to the metal rack. I went back to my scrap hardware bin and found a little bracket, some screws of the right diameter and thread, and also some nice big washers. I also decided to re-purpose an old belt I've had since high school that no longer fit. I drilled a couple of holes in the leather and added the belt to the mounting hardware. Not sure how necessary it will be, but it can be used to secure the load if needed.

So that's it. A fun little project completed entirely with junk I had hoarded in the garage.

From Crankbased

Saturday, March 16, 2013

Blue Ribbon Road Ride: Woodside - Pescadero Loop

One of my all time favorite bay area road rides -- Woodside (or there abouts) to Pescadero.

What's required to make it one of the all-time greats?

Good climbs
World-class views
Fun descents
Decent roads
Few cars
Good eats

This ride checks all those boxes and then some.

I have two locations where I recommend to start this ride.
You can start from the town of Woodside -- There's a park-n-ride parking lot just off 280 at 84. OR, if you'd like to add a few extra warm-up/cool-down rolling miles, you can start on Canada Rd., at the junction with hwy 92.

The ride is a fairly simple loop that takes you over a wooded ridge, drops you down through picturesque villages, and provides a bike-friendly lunch stop before leading you up the beautiful California coastline where you will turn inland for an amazing climb back through the woods and finally descending back to Woodside. I've discovered a few "add-ons" or alternates that make the ride more interesting if you care to mix it up a bit.

Here's the route with all the bells and whistles thrown in:


To shorten the ride, you can start in Woodside and eliminate the Canada Rd. out-n-back portion. Also, once you descend Pescadero Creek Rd., you can roll straight into the town of Pescadero for lunch and skip the little southern loop on Butano Creek / Cloverdale Rd.

Once you hit Pescadero, plan to stop at the biker friendly deli/grocery store for lunch: Arcangeli / Norms Market. Just around back of the store is a little grassy area with picnic tables, a water spigot, and an outhouse. Just about everything one would need in a reststop. The store is known for their artichoke bread. They bake some tasty sweets too. But I usually go for a nice sandwich from their awesome deli menu.

As you leave Pescadero, you head north on the lightly traveled Stage Road to San Gregorio. There's one last little rest stop opportunity at the General Store. Further up Stage Rd. you'll dump onto Hwy 1 for a short distance before you begin your climb back inland, up and over the ridge. You can keep it simple, and turn Rt., directly on to Tunitas Creek Rd. (previously used on the Tour of California), or you can continue up Hwy 1 a short distance to Verde Rd. (my preferred route) as I show on the map above. You'll turn Rt. from Verde Rd. onto Lobitos Creek Rd. (pass the Lobitos Crk Rd. Cutt-Off). It's a super sharp Rt. turn onto Lobitos Creek Rd. and might be easy to miss.

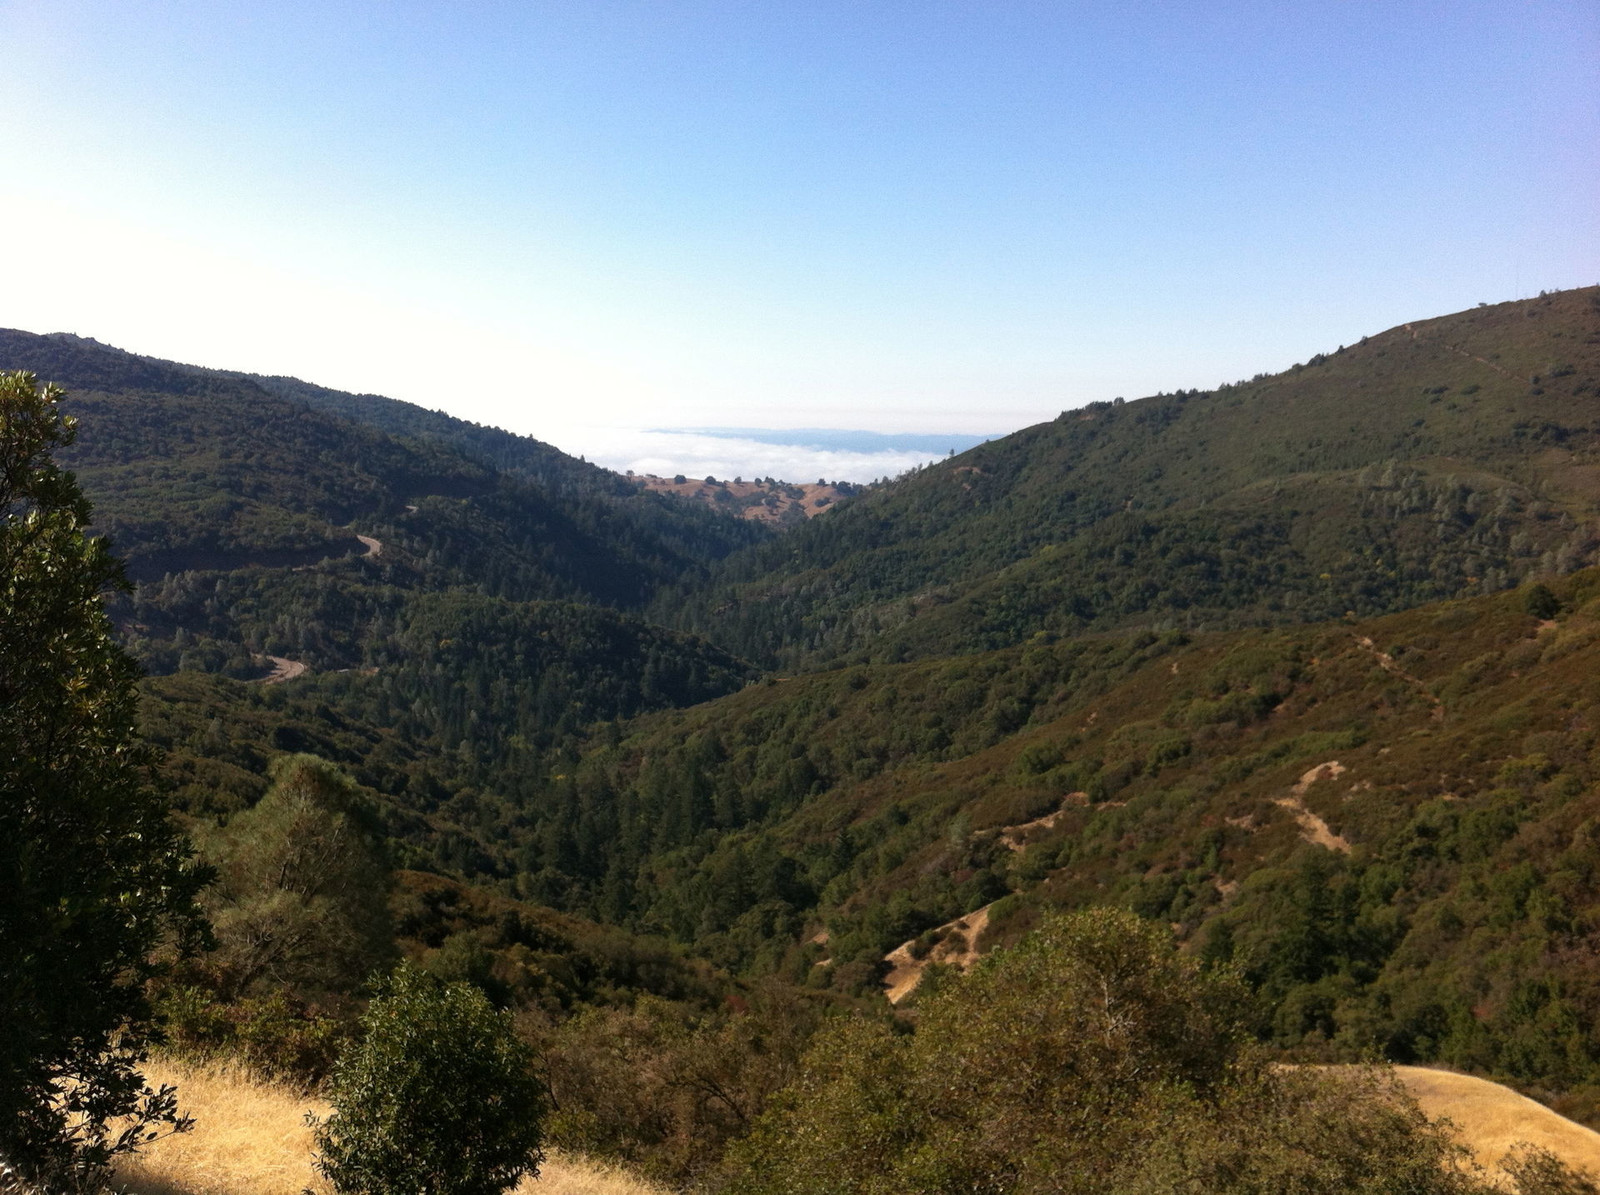
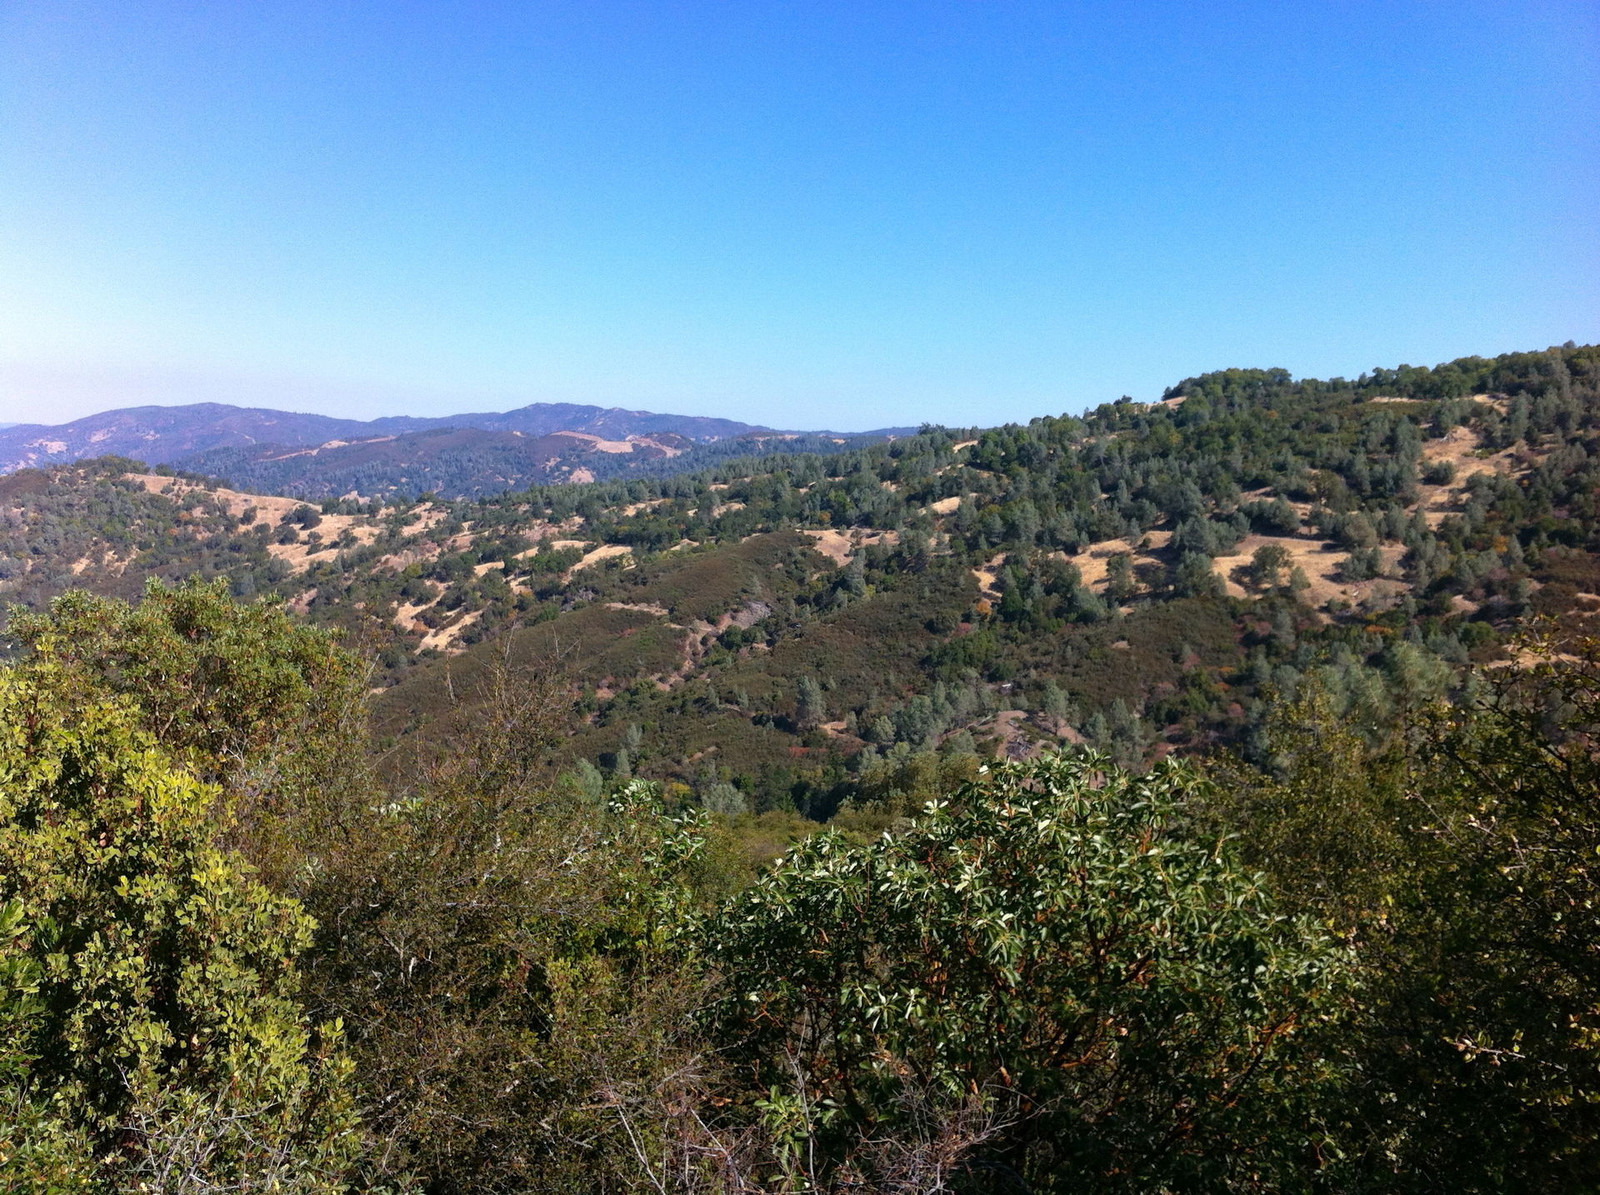
Most of the time I'm enjoying myself too much to take pictures, but I recently snapped a few from the climb heading back up the ridge after leaving the coast. I think these are mostly from the Lobitos Creek Rd. portion.


Once you drop back down to Tunitas Creek, and resume your climb back over the ridge, you enter into a beautiful redwood forest. My pics from that portion of the ride didn't turn out because of the low light conditions. The Tunitas Creek climb is long and beautiful through a dense redwood/fern forest. Once you reach the summit, where Tunitas Creek meets Skyline / Hwy 35 -- you've basically finished all of the real work. Careful as you descend back into Woodside. And if you decided to log the extra miles of Canada Rd. -- Congratulations for finishing the whole enchilada!

This truly is one of my favorite bay area rides. If you are visiting and looking for an amazing adventure that shows off the beautiful California coast and coastal range mountains -- this is it!