Monday, February 10, 2014

3m Scotch 2228 Tape Chainstay Protector. Cable Rub, Frame Protection Too?

I'm in the process of building a bike up from scratch and wanted to add a chainstay protector to protect the fresh paint. During my google search for a suitable product, I stumbled upon a couple of instances that referred to using 3M Scotch 2228 tape. It's a thick rubberized tape, and it's pretty easy to work with.

Here's how it worked out.


About $10 a roll at my local big-box hardware store. You might find it cheaper on-line. The product I found is 1 inch wide, by 10 feet long. The thickness is .065 (or 1.65mm)


It's a nice, thick, rubberized tape on a paper backing that easily peels off.


Cut a piece off, and shape to your liking. (Others have suggested that you want to round the corners to help prevent them from peeling. Also, shaping helps to make the protector look like a pre-made product. I cut mine pretty crude, but it works ok for me.)


Gently set it on the frame and get it aligned to your satisfaction. It's pretty sticky, but you can lift it up and re-align it pretty easy if you haven't pressed it too the frame yet. Once aligned, run a finger down the centerline to get it set, then gently press it in to place by applying pressure over the entire surface.


Added Bonus:

Can it be used as a cable rub protector too?
Something else that was on my shopping list for the new build. I was looking for the clear, thick tape to protect the frame from cable rub. After I purchased the tape for the chainstay protector, I decided to give this a try. There is a product on the market that you clip on the exterior of your cable housing that appears to function similarly.

I cut a small piece from the roll of tape (maybe 1/2 inch in length) and rolled it around the cable housing at the point the cable contacts the frame. The tape is so rubbery and pliable that you can stretch it and mold it. I didn't want the tape to overlap as it would be pretty bulky if it were double-thickness. Cutting the tape slightly short allows you to stretch the tape and bring the edges into alignment. This tape really sticks well to itself.


I thought it turned out ok. I guess time will tell if this is a good alternative.


Wednesday, February 5, 2014

Repairing Broken Dremel 395

I've had the Dremel 395 for most of my adult life it seems. It's been a life saver for a number of small projects over the years. I've used it to fashion small parts, clean up rough edges, sand, grind, cut... it does all sorts of helpful things. Most recently, I used it to cut a slot in a rusted allen bolt that had a stripped head. The slot allowed me to use a screw driver to finally free and remove the stubborn bolt.

Well, at the end of that task, the bit stopped turning. The motor would run and spin like you'd expect, but the bit would just sit there.

Sadly, I stared at the old tool, just then realizing how much I had used it over the years. Thinking to myself, "Well, it's been a good life for you Mr. Dremel. Time to move on. It's a disposable world now. You can always get a new one at the big box hardware store just a mile away."

But I hate that. The ol' Dremel and I have a history. I don't want a new one.

I did a quick google for something along the line of "my dremel won't turn" or whatever and within a minute I was like... Yeah, this can be fixed. Within another minute, the $6 part was on it's way to my door step.

Here's a small short tutorial on the repair.

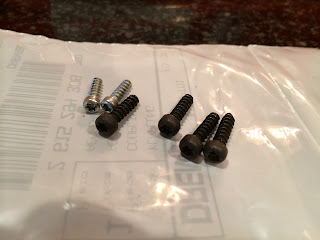
Unscrew the nose piece, remove the wire tool hanger at the cable end, and remove the 6 small torx screws


Lift off the front of the Dremel case (no need to remove the motor assembly).


Observe the failed collar that connects the motor drive to the collet


New coupling (next to broken, old part) as received from Sears on-line ordering (they're available from many sources all over the internet).


Remove, replace and re-install


All good.

Estimated time: 5 minutes